Overview
Teaching: 55 min
Exercises: 0 minQuestions
How do we download the WordPress software?
How do we install the WordPress software?
How do we finalie the WordPress installation?
Objectives
Create a WordPress database and user.
Modify the Apache configuration.
Download the WordPress source code.
Configure the WordPress web root directory.
Finalize the installation using the WordPress GUI.
During the previous three episodes, we finished installing our LAMP software stack on our virtual machine. Consequently, in this episode we are now ready to move on to the activity of installing and configuring our WordPress application. The entire procedure will require us to accomplish the following systems administration tasks:
- we will create a WordPress database and user
- we will modify our Apache web server configuration
- we will download the WordPress software
- we will configure the WordPress web root directory
- we will complete the installation using the WordPress web interface
Create the WordPress MySQL Database and User
The very first thing we need to do is log into our database command prompt using the MySQL root administrative account. To do so, issue the following command:
$ mysql -u root -p
You will be prompted to enter your password. (Remember from a previous episode, that we had set this password to rootMySQLPassword.) We now want to create a separate database that only the WordPress application can access. To keep things simple, let’s name the database wordpress.
mysql> CREATE DATABASE wordpress DEFAULT CHARACTER SET utf8 COLLATE utf8_unicode_ci;
If successful, the output should look like the following:
Query OK, 1 row affected (0.00 sec)
Next, it is a good idea to also create a separate MySQL user (who does NOT have total and unlimited MySQL administrative access) that WordPress will use exclusively to administrate the wordpress database. In order to tighten security, only WordPress is required to have access to this user’s authentication credentials and the only database this user has access to is the wordpress database. Again, to keep things simple, let’s call this user wordpressuser. In production, you would want to create a strong and unique password for this user. However, for this course, we will use userMySQLPassword as the password.
mysql> GRANT ALL ON wordpress.* TO 'wordpressuser'@'localhost' IDENTIFIED BY 'userMySQLPassword';
If successful, the output should look like this:
Query OK, 0 rows affected, 1 warning (0.00 sec)
Finally, in order to ensure that our modifications take immediate effect, we need to flush the privileges.
mysql> FLUSH PRIVILEGES;
The output should look like this:
Query OK, 0 rows affected (0.00 sec)
You may now exit the MySQL database system management application.
mysql> QUIT;
Modify the Apache Web Server Configuration
For WordPress to function properly, we need to make a few minor modifications to our Apache web server configuration.
First, we need to enable the use of .htaccess files. The reason for this is that WordPress and, more specifically, many of the WordPress plugins use this file to perform “in-directory” adjustments which will affect the behavior of Apache.
To do this, we need to modify the main Apache configuration file, located here: /etc/apache2/apache2.conf.
$ sudo nano /etc/apache2/apache2.conf
Look for the section that starts with this heading:
# Sets the default security model of the Apache2 HTTPD server. It does
# not allow access to the root filesystem outside of /usr/share and /var/www.
# The former is used by web applications packaged in Debian,
# the latter may be used for local directories served by the web server. If
# your system is serving content from a sub-directory in /srv you must allow
# access here, or in any related virtual host.
In order to allow .htaccess files, we need to set an AllowOverride directive within a Directory block that points to our web root directory. For this reason, append this block to the bottom of this section:
<Directory /var/www/html/>
    AllowOverride All
</Directory>
Then save and exit the file.
Second, in order to use WordPress’s permalink feature, we need to enable the mod_rewrite Apache module. To accomplish this, we can invoke the a2enmod command as follows:
$ sudo a2enmod rewrite
Enabling module rewrite.
To activate the new configuration, you need to run:
  service apache2 restart
Before restarting the Apache service, we should test to make certain that our configuration changes are correct.
$ sudo apache2ctl configtest
Look for the following result:
Syntax OK
If everything is OK, then it is safe to restart Apache so that our changes take immediate effect.
$ sudo systemctl restart apache2
And, to be certain, please check the status of the Apache service by running the following:
$ sudo systemctl status apache2
Look for the line that reads:
Active: active (running) since...
Download the WordPress Software
At this point, all of the prerequisite software for our virtual machine has been properly installed and configured. We are now ready to download the latest version of WordPress which is housed at wordpress.org. We’ll use the wget command to grab the installation package and store it in the /tmp directory until it’s ready to moved to /var/www/html.
$ wget http://wordpress.org/latest.tar.gz -O /tmp/latest.tar.gz
$ cd /tmp
  % Total    % Received % Xferd  Average Speed   Time    Time     Time  Current
                                 Dload  Upload   Total   Spent    Left  Speed
100 7851k  100 7851k    0     0  4176k      0  0:00:01  0:00:01 --:--:-- 4176k
Like a lot of open source software available via the Internet, the file name (latest.tar.gz) ends with a .tar.gz extension. This means that this is a TAR (short for Tape Archiving) package that has been compressed using the GNU zip utility. To decompress and extract the file contents, we will use the following command:
$ tar xzvf latest.tar.gz
The required command-line arguments listed above are as follows:
x: extract the package contentsz: decompress the file using GNU zipv: be verbose - show me all of the file pathsf: extract from a specified file (latest.tar.gz)
If you engage is any subsequent Linux systems administration during the remainder of your lifetime, you will probably use the tar all the time.
The output should look something like this:
wordpress/
wordpress/wp-settings.php
wordpress/wp-cron.php
wordpress/wp-comments-post.php
...
... lots and lots more files...
...
wordpress/wp-includes/update.php
wordpress/wp-includes/comment.php
wordpress/wp-includes/class-wp-text-diff-renderer-table.php
wordpress/wp-config-sample.php
The next step is to create a blank .htaccess file that WordPress will use later. Then use the chmod command to set appropriate file permissions.
$ touch /tmp/wordpress/.htaccess
$ chmod 660 /tmp/wordpress/.htaccess
Basically, the 660 argument gives read/write access to both the file’s specified owner and group.
At this point, it’s also a good idea to create a working copy the sample WordPress configuration file. Later, we will modify this file to include all of the customizations which are specific for each of our own WordPress websites.
$ cp /tmp/wordpress/wp-config-sample.php /tmp/wordpress/wp-config.php
While we’re at it, we should also create an upgrade directory so that WordPress can use this to perform any subsequent software upgrades without running into any permission conflict errors.
$ mkdir /tmp/wordpress/wp-content/upgrade
Now we can finally copy the entire contents to the web document root.
$ sudo cp -av /tmp/wordpress/. /var/www/html
Configure the WordPress Web Root Directory
Before we complete the installation via our web browser, we need to perform a couple of additional systems administration tasks. First, we need to set reasonable file and directory ownership and permission attributes. These values are not configured by default and, unless we do this, WordPress will not function properly. Second, we need to generate secret keys which will help provide greater security for our installation.
Adjust Ownership and Permission Attributes
To begin with, we need to execute some basic commands that will set appropriate ownership and permission attributes for the directories and files that are stored in our WordPress web root directory. Once again, this directory is /var/www/html.
It’s possible, going forward, that we might need to edit, copy, move, add, rename, or remove WordPress files and directories. For example, if we update WordPress or install a new WordPress plugin, these actions would fail unless we adjust the default file and directory settings.
The two objectives for this section are as follows:
1) Make the Linux user account that we used to log into the VM, ubuntu, the owner of all files and directories contained in /var/www/html.
2) Make certain that the Linux group account that runs the Apache service, www-data, can also perform the same file management functions.
To accomplish both of these tasks at once, we can issue the following command:
$ sudo chown -R ubuntu:www-data /var/www/html
The -R option basically instructed the chown (or change-ownership) command to execute on every file and directory in the /var/www/html directory root recursively.
Next, we need to ensure that all new files created within every subdirectory of /var/www/html also inherit the www-data group. Again, this is to make certain that the account responsible for running the Apache service still retains group ownership of all WordPress content. This attribute is referred to as a setgid bit. Consequently, to enable the setgid bit on every WordPress subdirectory, we can issue the following command:
$ sudo find /var/www/html -type d -exec chmod g+s {} \;
In this case, we basically used the find command to locate all subdirectories in the WordPress web root directory and then we executed the chmod command to enable their setgid attribute. Let’s move on…
The web server program will require to write files and make theme or plugin changes to the wp-content directory. To enable this, we’ll issue the following three chmod commands:
$ sudo chmod g+w /var/www/html/wp-content
$ sudo chmod -R g+w /var/www/html/wp-content/themes
$ sudo chmod -R g+w /var/www/html/wp-content/plugins
And that takes care of customizing all of the required file and directory ownership and permission settings.
Configure the WordPress Configuration File
Now comes the part where we make specific changes to our main WordPress configuration file.
The first thing we need to do is provide better security and create new secret keys. We do NOT want to use the default keys that were provided because then it would be very easy for attackers to guess at their values. Lucky for us, the WordPress website provides a useful utility that can generate new random keys for us.
To generate new random keys, we will issue the following command:
$ curl -s https://api.wordpress.org/secret-key/1.1/salt/
You should get back a result that looks similar to this:
define('AUTH_KEY',         '^u,3mX7Nq^FBHHpEU-t!]`+V-pi%+[miS5K@B?G1#N])O,L(p{L5IOi@-LlRYzj=');
define('SECURE_AUTH_KEY',  'c#|EYF@n(6L}h!f=0R!iKc@Fb3k(XbkbIh@<tLzHb(.gW;a1yh-<^{<U_+Db4edn');
define('LOGGED_IN_KEY',    '7n_ejfieDetb<|+dEbiR<doD;t%#<^ZmHQU]m<3N38K<f/3R6C.wYQ+M|c~:CMU}');
define('NONCE_KEY',        'LC^,-vm`9F)<b}SNw&h-/w#u~9R!G]*R3~HvMEx6+-KO|+e3gylhTDSg#Gh7-9sv');
define('AUTH_SALT',        '(le/k2eZDhR`;^Vh%ZuFBqW<hKgrJaWo!ks)q(G^pw-O)akt0!o~{#xyciC}x_CX');
define('SECURE_AUTH_SALT', ':@K^VRNux}t}{W r-|7(~Q!bY-)9W+S!I>R=M@R-@qXX<I{D(<lt[+-kSzvimo~3');
define('LOGGED_IN_SALT',   '+11P|@+WO-8+`nJ^n*Qe]Z2DUG$b|1RLYr_uW0;_G-S;lZ<[q,ra@ukw+,*,5ivi');
define('NONCE_SALT',       '3{8xtE LEaw%?j[i%%/2x]<r8|s>e(blp abLpraM;X41Z)+Yroe7mlO9%x`C!{i');
Please note: Do NOT just copy and paste these keys into your own configuration. Please generate your own unique values. The above output is simply an example.
In any event, we need to paste our own unique secret keys into our WordPress configuration file. To that, please open the configuration file using your editor:
nano /var/www/html/wp-config.php
Then find the section that contains the default secret keys. It should look like this:
/**#@+
 * Authentication Unique Keys and Salts.
 *
 * Change these to different unique phrases!
 * You can generate these using the {@link https://api.wordpress.org/secret-key/1.1/salt/ WordPress.org secret-key service}
 * You can change these at any point in time to invalidate all existing cookies. This will force all users to have to log in again.
 *
 * @since 2.6.0
 */
define('AUTH_KEY',         'put your unique phrase here');
define('SECURE_AUTH_KEY',  'put your unique phrase here');
define('LOGGED_IN_KEY',    'put your unique phrase here');
define('NONCE_KEY',        'put your unique phrase here');
define('AUTH_SALT',        'put your unique phrase here');
define('SECURE_AUTH_SALT', 'put your unique phrase here');
define('LOGGED_IN_SALT',   'put your unique phrase here');
define('NONCE_SALT',       'put your unique phrase here');
Delete this section and then paste the values that you generated for yourself. Once again, as an example, the lines I replaced now look like this:
define('AUTH_KEY',         '^u,3mX7Nq^FBHHpEU-t!]`+V-pi%+[miS5K@B?G1#N])O,L(p{L5IOi@-LlRYzj=');
define('SECURE_AUTH_KEY',  'c#|EYF@n(6L}h!f=0R!iKc@Fb3k(XbkbIh@<tLzHb(.gW;a1yh-<^{<U_+Db4edn');
define('LOGGED_IN_KEY',    '7n_ejfieDetb<|+dEbiR<doD;t%#<^ZmHQU]m<3N38K<f/3R6C.wYQ+M|c~:CMU}');
define('NONCE_KEY',        'LC^,-vm`9F)<b}SNw&h-/w#u~9R!G]*R3~HvMEx6+-KO|+e3gylhTDSg#Gh7-9sv');
define('AUTH_SALT',        '(le/k2eZDhR`;^Vh%ZuFBqW<hKgrJaWo!ks)q(G^pw-O)akt0!o~{#xyciC}x_CX');
define('SECURE_AUTH_SALT', ':@K^VRNux}t}{W r-|7(~Q!bY-)9W+S!I>R=M@R-@qXX<I{D(<lt[+-kSzvimo~3');
define('LOGGED_IN_SALT',   '+11P|@+WO-8+`nJ^n*Qe]Z2DUG$b|1RLYr_uW0;_G-S;lZ<[q,ra@ukw+,*,5ivi');
define('NONCE_SALT',       '3{8xtE LEaw%?j[i%%/2x]<r8|s>e(blp abLpraM;X41Z)+Yroe7mlO9%x`C!{i');
Ok. We are almost done. The second last thing we need to do is modify the configuration file so that the WordPress website knows how to take to the WordPress database which we created much earlier during this episode. We need to tell the WordPress website that the database name is wordpress, the database user is wordpressuser, and the database user’s password is userMySQLPassword. These variables are defined near the top of the configuration document. Modify them so that they look like this:
define('DB_NAME', 'wordpress');

define('DB_USER', 'wordpressuser');

define('DB_PASSWORD', 'userMySQLPassword');
The very last configuration change is to define the method that WordPress should use to write to the Ubuntu filesystem. We’ve already given the web server group explicit permission to write directly to WordPress web root subdirectories (like wp-content/themes and wp-content/plugins, for example) so we can specify the method to be direct. If we did not specify direct, then WordPress would assume that we wanted to use FTP and it would prompt us for our FTP credentials every time we performed any upload, update, or installation actions.
This setting can be appended to the end of the confirguration document as follows:
define('FS_METHOD', 'direct');
You may now save and exit the WordPress configuration file.
Complete the Installation using the WordPress GUI
The good new is that we are now finished using the Linux command line! Now that all of the necessary system administration tasks have been completed, we are ready to complete the WordPress installation using our web browser interface.
Open your web browser and navigate as follows:
https://<your_externalserver_IP>
For example, to get to my WordPress site, I navigated here:
https://206.167.181.126
If everything is in proper working order, you should see a message that is prompting you to select the language which you would like to use.
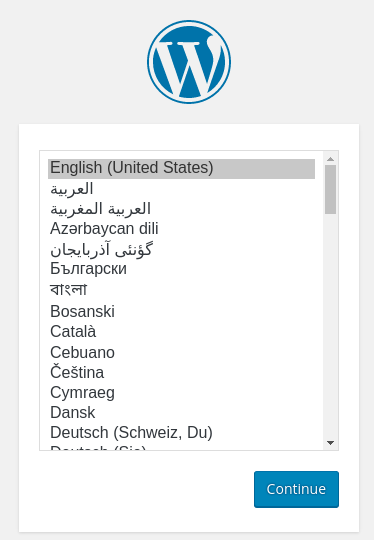
If you see this, congratulations! You accomplished a great deal of work to get here. In any event, I selected English. And then I clicked Continue.
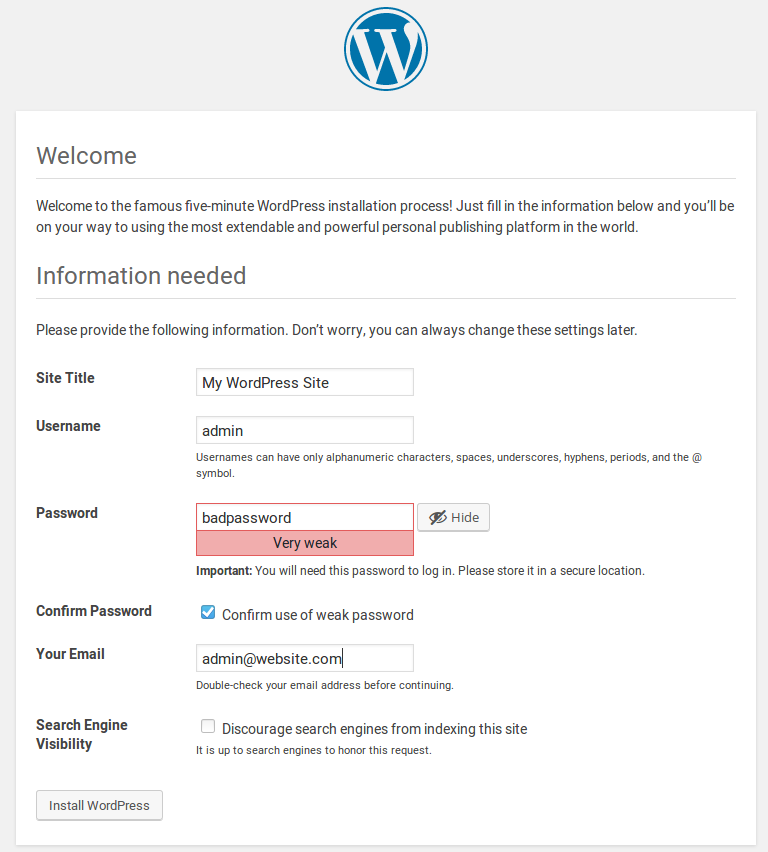
This should take you to the “Welcome” page. On this screen, You will need to provide the following information:
- Title of your WordPress site
- WordPress administrator username
- WordPress administrator user’s password
- Your email address
- And whether or not you want search engines to index your website
After entering this information, click Install WordPress.
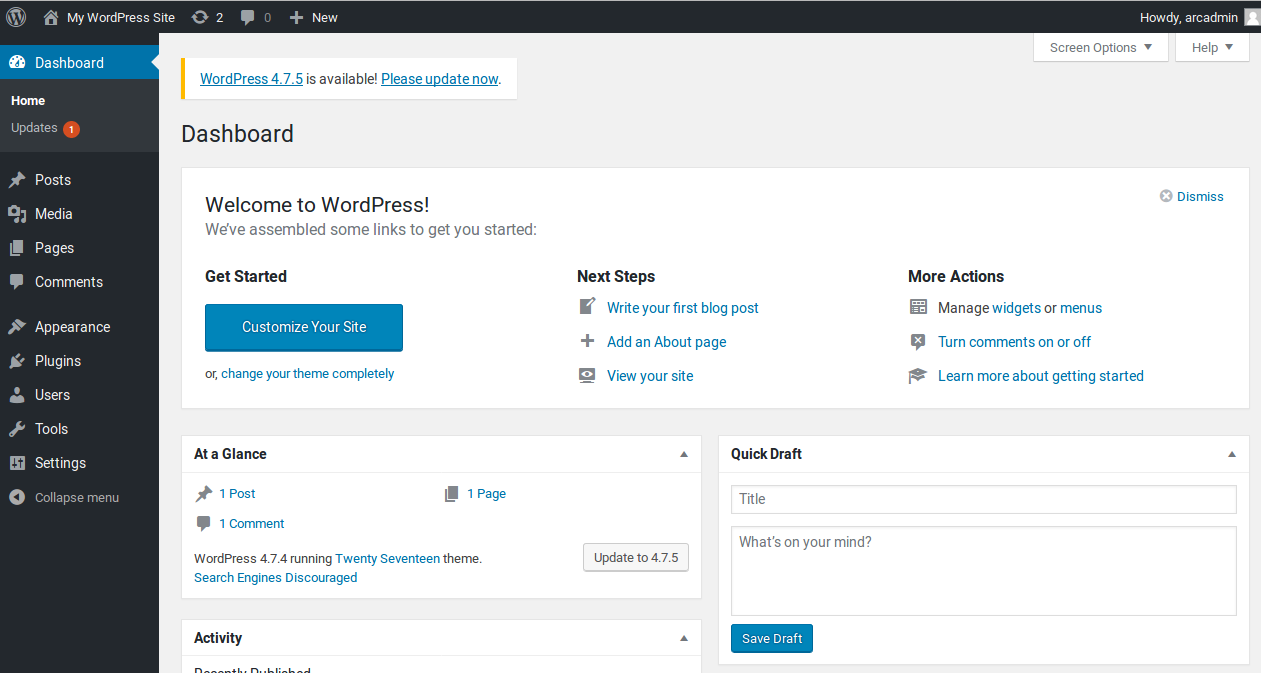
If all goes well, you should see the following “Success!” message which will prompt you to log in using your new WordPress administrator account. Click Log In.

Once you log in, you will be presented with the WordPress administration dashboard interface. From here, you can make all the customizations, install all the updates and plugins, and create all the content that you so desire.
Key Points